A database consists of several sheets. The first step is to determine which sheets your company needs and which fields each sheet should contain. In other words, you need to clarify the data or workflows your database needs to manage.
For example, if you're applying the database to member management, you might need a "Member Information" sheet (with fields like name, phone number, address, and registration date) and a "Purchase History" sheet. For inventory management, you might need "Product List", "Incoming Orders", and "Outgoing Orders" sheets, with "Product List" containing fields like product name, product ID, specifications, and unit price.
If you're not yet sure which sheets you need, start by reviewing the paper or digital forms you currently use to see what information your existing workflow requires. If no existing forms are available, try simulating your internal operations. For example, list out what information should be recorded when an order comes in. If you're still unsure, you can also browse the pre-built templates under Install Templates, or apply a Quick Template when creating a new sheet.
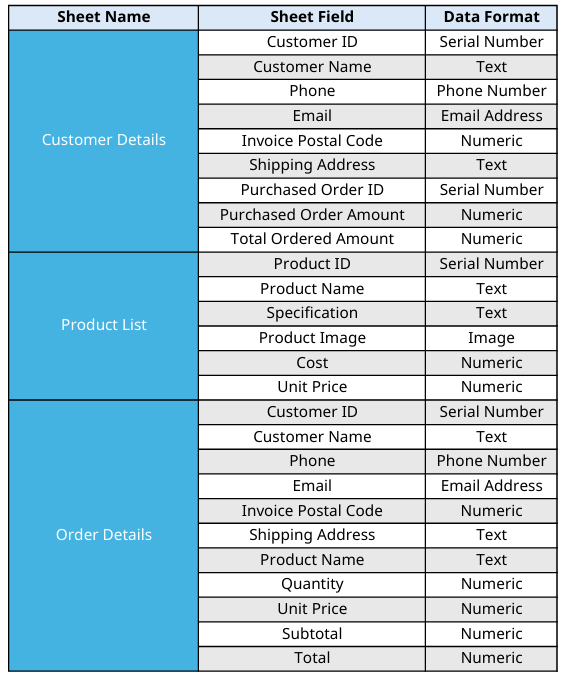
Once you've determined the sheet names and fields, the next step is to choose the appropriate data format for each field, such as number, text, date, or link, so you can assign the correct field type when building the sheet. This helps avoid data loss or display errors caused by changing the field type later.
Example:
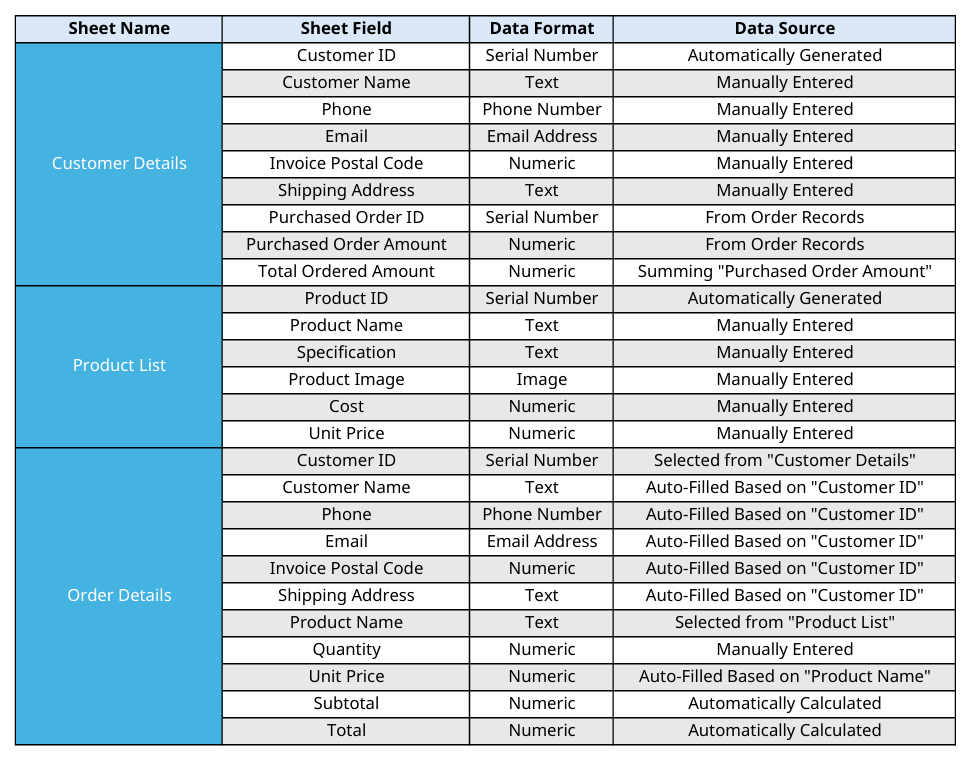
Once your sheets and fields are planned, the next step is to establish the relationships between them. Whenever a feature requires data from more than one sheet, those sheets need to be linked.
For example, suppose your company has three sheets: "Customer Details", "Product List", and "Order Details". If you want to select a customer or product directly when creating a new order, or view the products and total order amount for a specific customer, you'll need to link these sheets together. At this stage, go through each field from Step 1 and decide whether it should be entered manually, pulled in from another sheet, or calculated automatically with a formula.
Example:
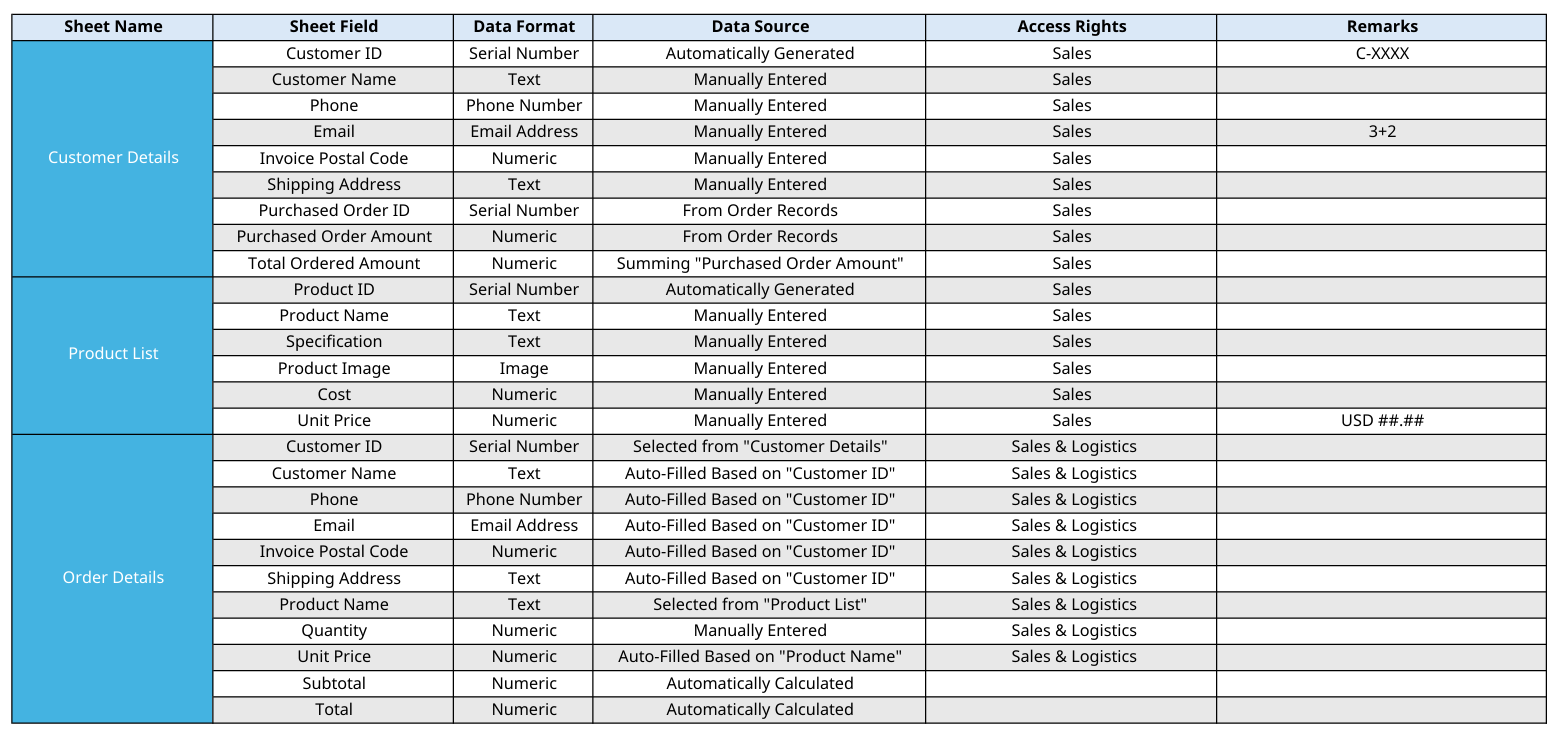
The final step is to decide which sheets each user can access and what permissions they have for each one. For example, sales staff might need access to "Customer Details", "Product List", and "Order Details"; logistics staff might only need access to "Order Details"; and finance staff might only need access to "Invoice Details".
Example:
Once you've completed these three steps, your database structure prototype is ready. You can now start building your sheets based on this plan.
 Thank you for your valuable feedback!
