 Design guide
Subtables are extremely useful for managing one-to-many relationships in your sheet. For example, you may want to create a record for a customer account with activity history records for multiple contacts, or you may need to create records for multiple items in a purchase order or quotation. Subtables are everywhere in business applications, and Ragic provides the simplest way for you to create and manage them.
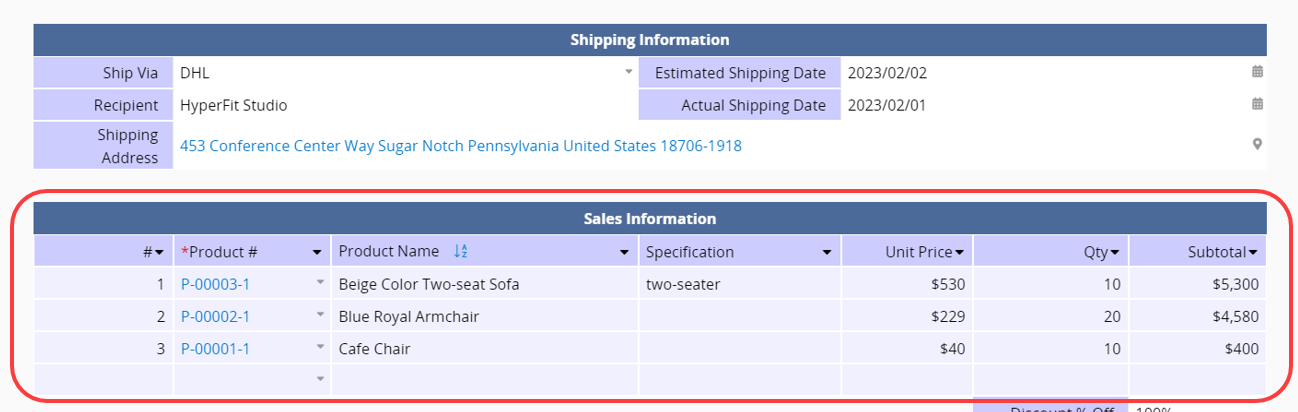
You can also use Formulas to calculate values in Subtables, such as totaling the amounts in a Subtable. In addition to general formulas, Ragic also provides Subtable formulas for more advanced calculations.
If a Subtable contains many records (for example, hundreds of rows), it may slow down loading and become hard to manage. In this case, you can use New Sheet From Subtable to manage each row as an independent record in a new sheet.
While creating a sheet in Design Mode, you can simply create a Subtable by arranging fields horizontally. Ensure that the field headers are placed next to each other in a row of consecutive cells. Just start typing the next field header in the adjoining horizontal cell, disregarding where the field value of the previous field would typically be placed. The field values will automatically shift to be displayed vertically below the field headers.
Note:
1. A sheet cannot begin with a Subtable.
2. We recommend placing Subtables at the bottom of your sheet since Subtables will expand to accommodate new entries.
3. We suggest not placing more than one Subtable per row or placing an independent field next to the Subtable.
4. If you have different Subtables placed in different rows that start from different columns, it's suggested to place a long description field in between to prevent the displaying issue caused when Subtables expand.
5. It is not recommended to use only auto-generated fields without any manually entered data, as a new Subtable row is created only after manual input, which then triggers the auto-filled values.
For details on entering data, deleting entire rows, and filtering and sorting Subtable records, please refer to Using Subtables in the User Manual.
You can set a default filter or sort for Subtables, which filters and/or sorts the results displayed whenever records are viewed.
To set a default filter or sort, click the Save current subtable filter and sort as default option accessible from the drop-down arrow.

The default setting can be cleared by clicking the Remove current subtable default filter and default sort option from the same menu.

Adjusting field order: Drag a Subtable field header left or right to change the field order.
Moving the entire Subtable: Drag any Subtable field header up or down to the desired location, and the entire Subtable will move together.
If you want to add sequence numbers for each Subtable record, it is not recommended to use Auto Generated Field Values, because the numbering would continue across records instead of starting from 1 for each Subtable.

If you want each Subtable to start numbering from the beginning, you can choose a Free Text or Numeric field and set the Default Value to $SEQ.

After setting this up, each Subtable will start numbering from 1.

Sometimes, deleting Subtable data or other factors can cause sequence numbers in the Subtable to become discontinuous. You can follow the steps below to reset the sequence.
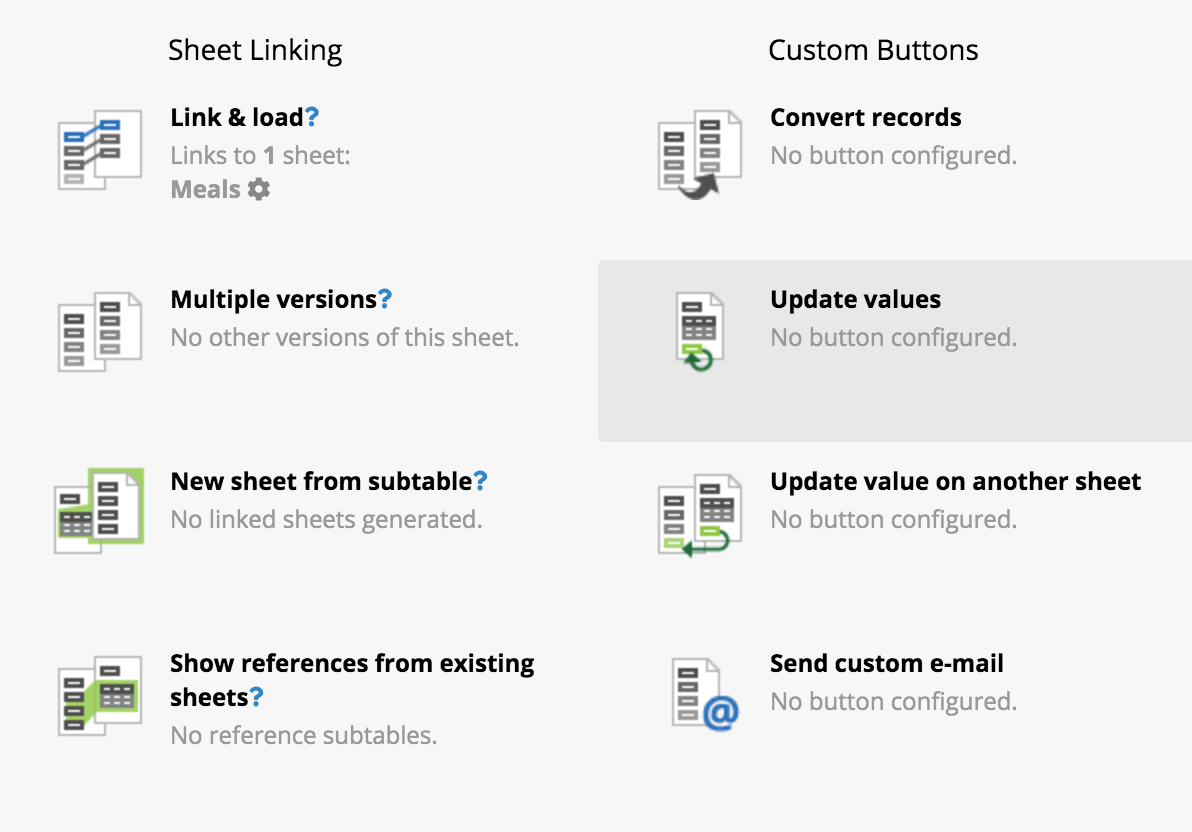
Go to the Form Page's Design Mode, click Form Tools, and choose Update Values. This will create an action button on the sheet.
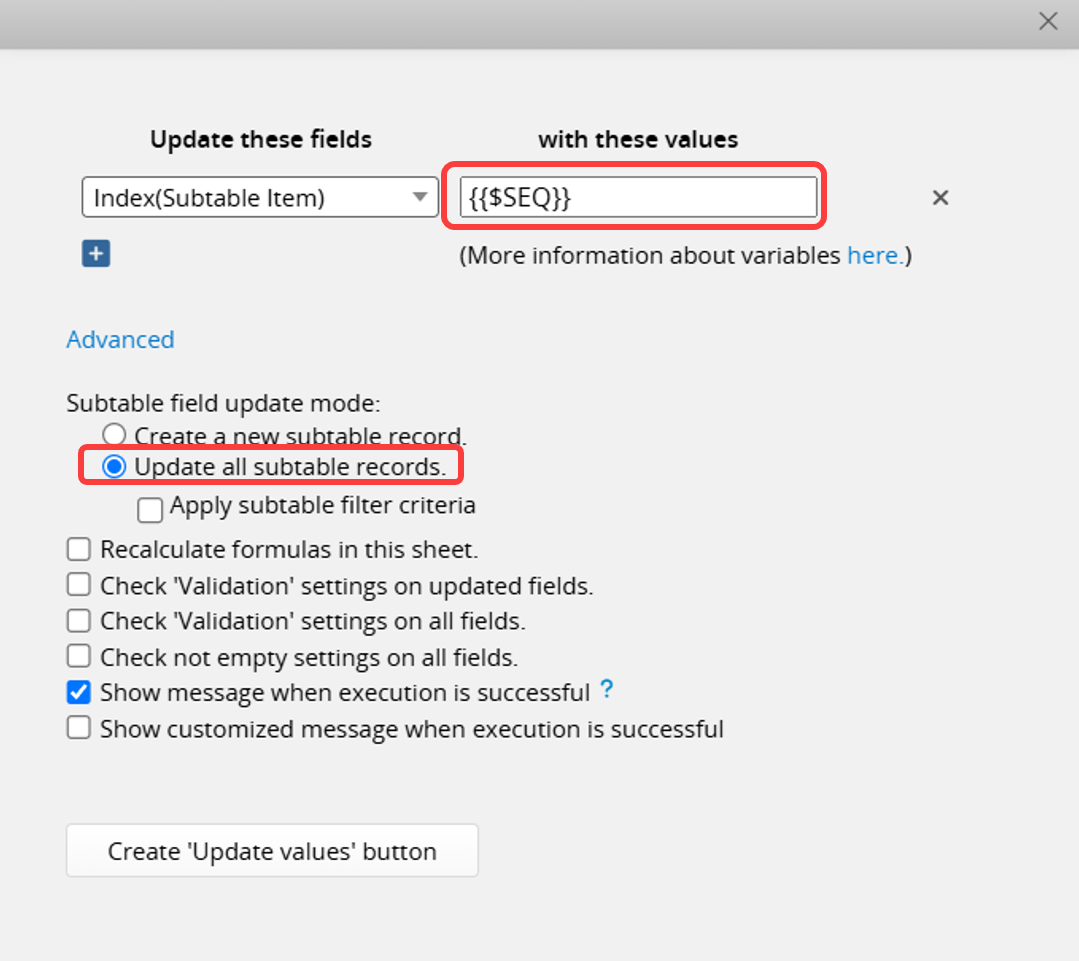
Choose the Subtable field with the default value $SEQ and enter {{$SEQ}} under with these values. Also, be sure to check the Update all subtable records option in the Advanced settings.
Remember to Save the design after creating the button. Once executed, the sequence numbers will automatically be reordered to be consecutive, such as changing from 1, 3, 4, 5 to 1, 2, 3, 4.
Before:
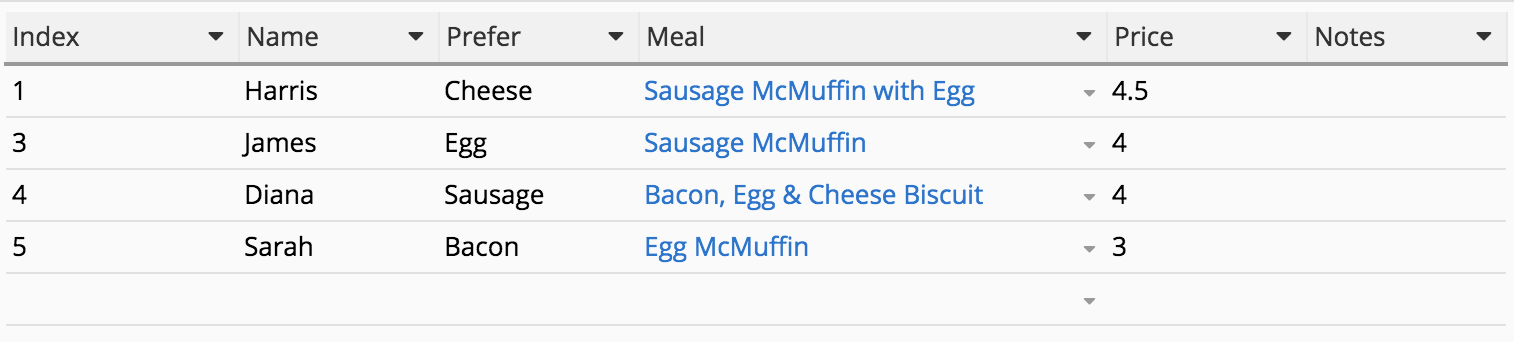
After:
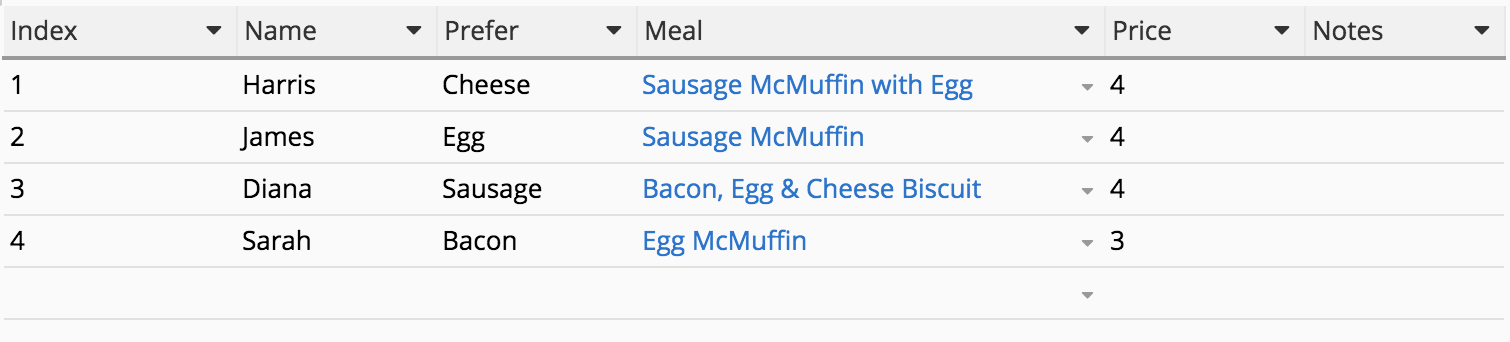
You can configure how Subtable row deletion is handled in Form Settings in Design Mode. There are three options:
1. No Subtable deletion allowed: Users will not be able to delete entire rows from the Subtable.
2. Detach the row from this entry: If a Subtable on this sheet has a new sheet created from Subtable or is a Reference Subtable, when deleting a Subtable record, the respective record will remain on the linked sheet but will be detached from this sheet.
3. Delete the row completely (default): If a Subtable on this sheet has a new sheet created from Subtable or is a Reference Subtable, when deleting a Subtable record, the record will also be deleted from the linked sheet.

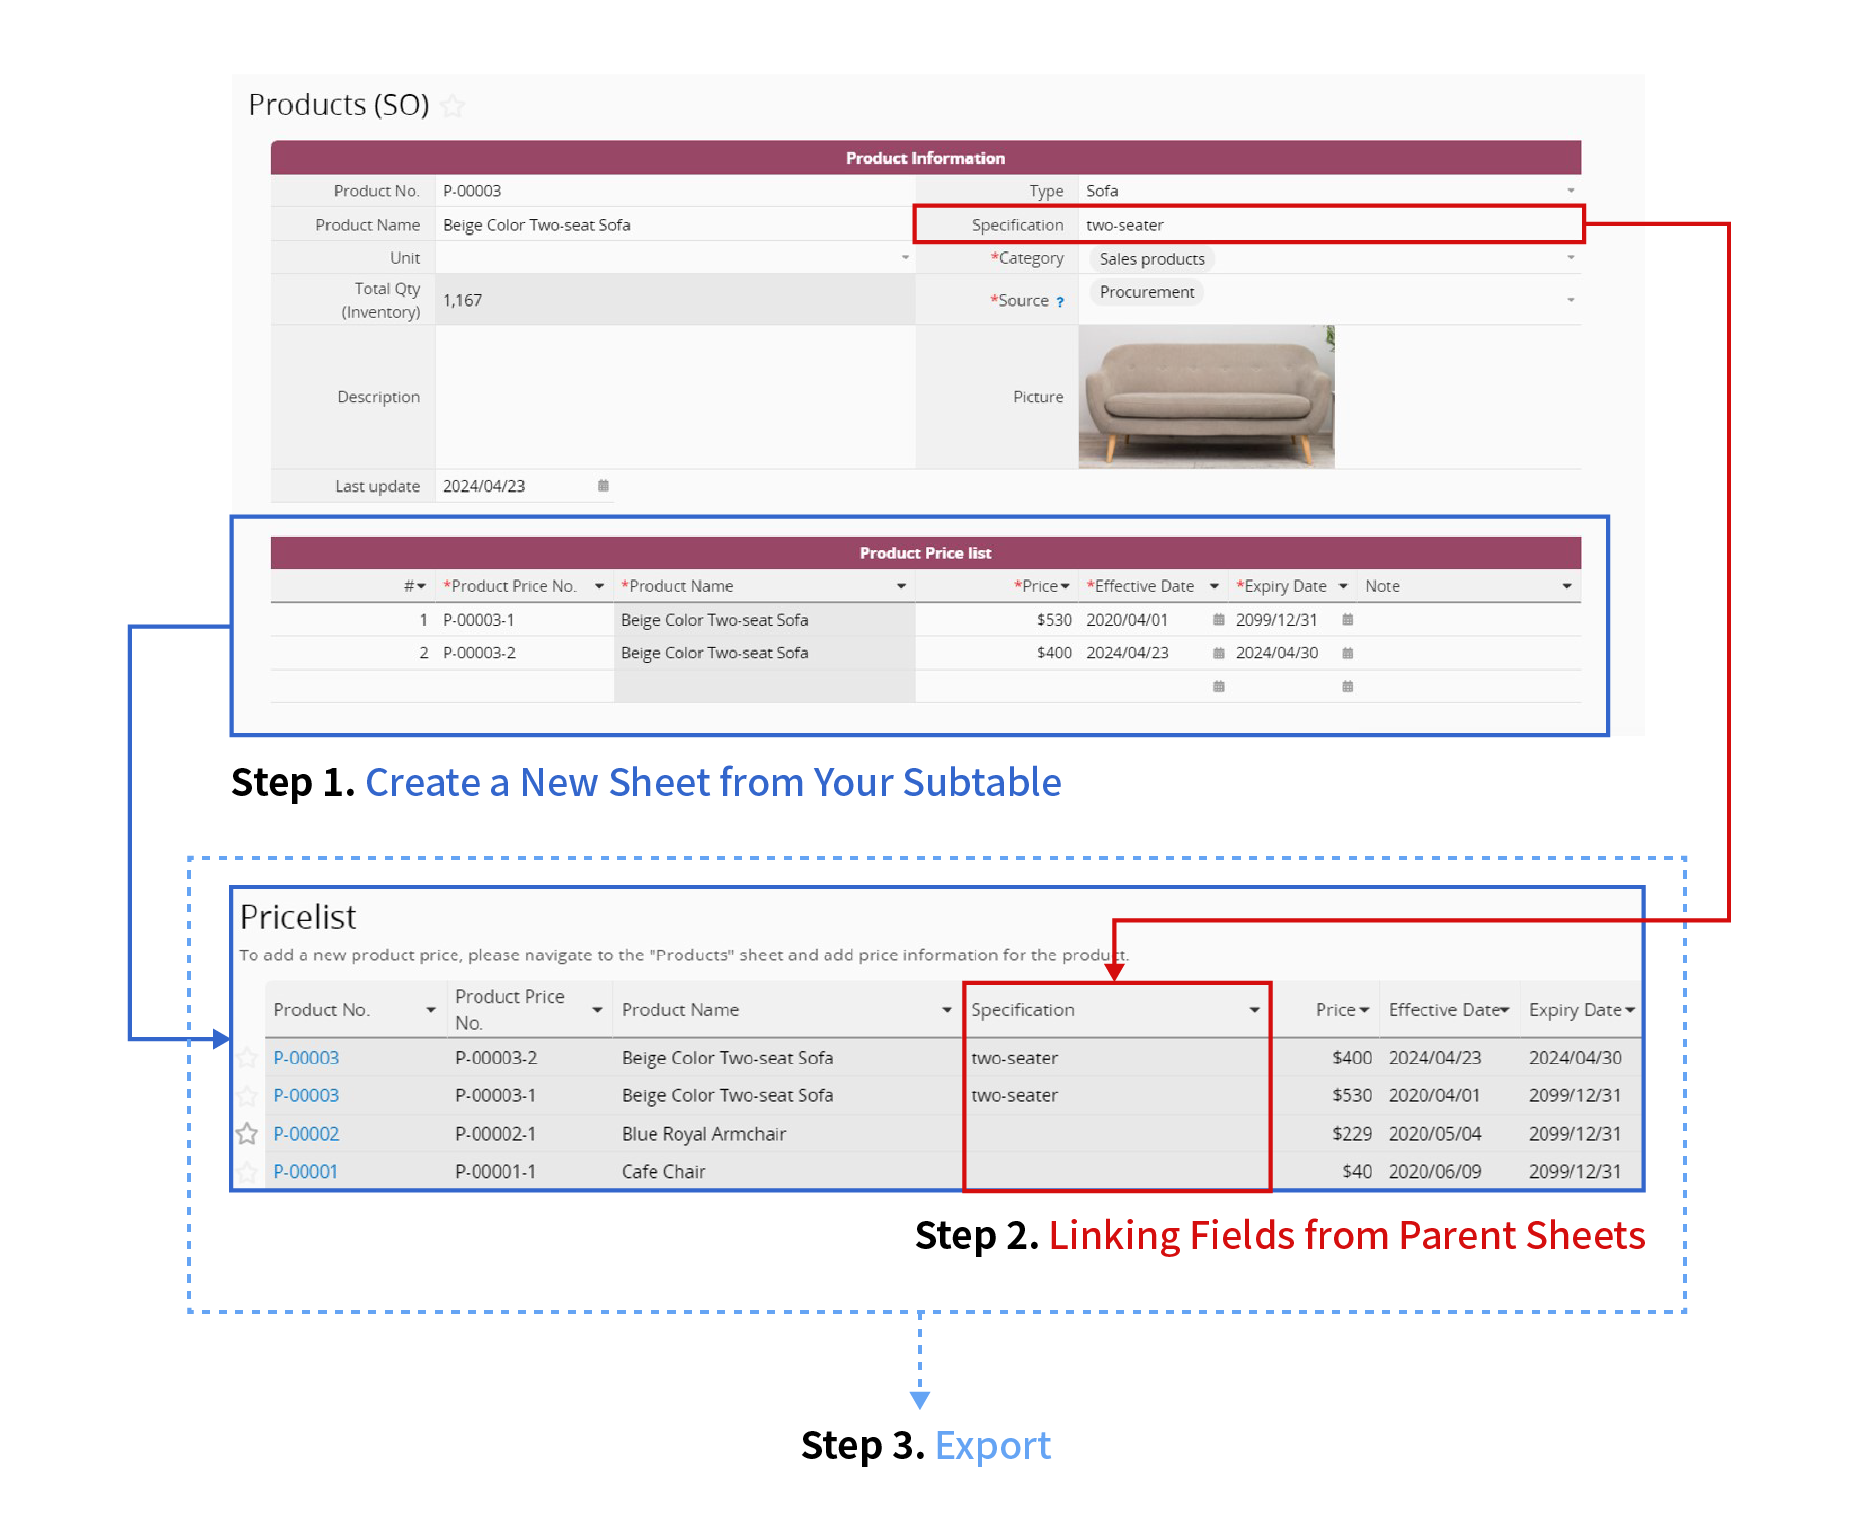
If you want to export data from your Subtable, you can follow these steps:
1. Create a New Sheet from Your Subtable. This will generate a new sheet with all the records from the Subtable of the original sheet.
2. By Linking Fields from Parent Sheets, you can add independent fields from the parent sheet. This ensures that the necessary data from the parent sheet will also be exported along with the Subtable data.
3. Export your data from your new sheet. It works just like exporting from a sheet.
For more detailed information about Subtables, you can refer to the following tutorial video.
 Thank you for your valuable feedback!